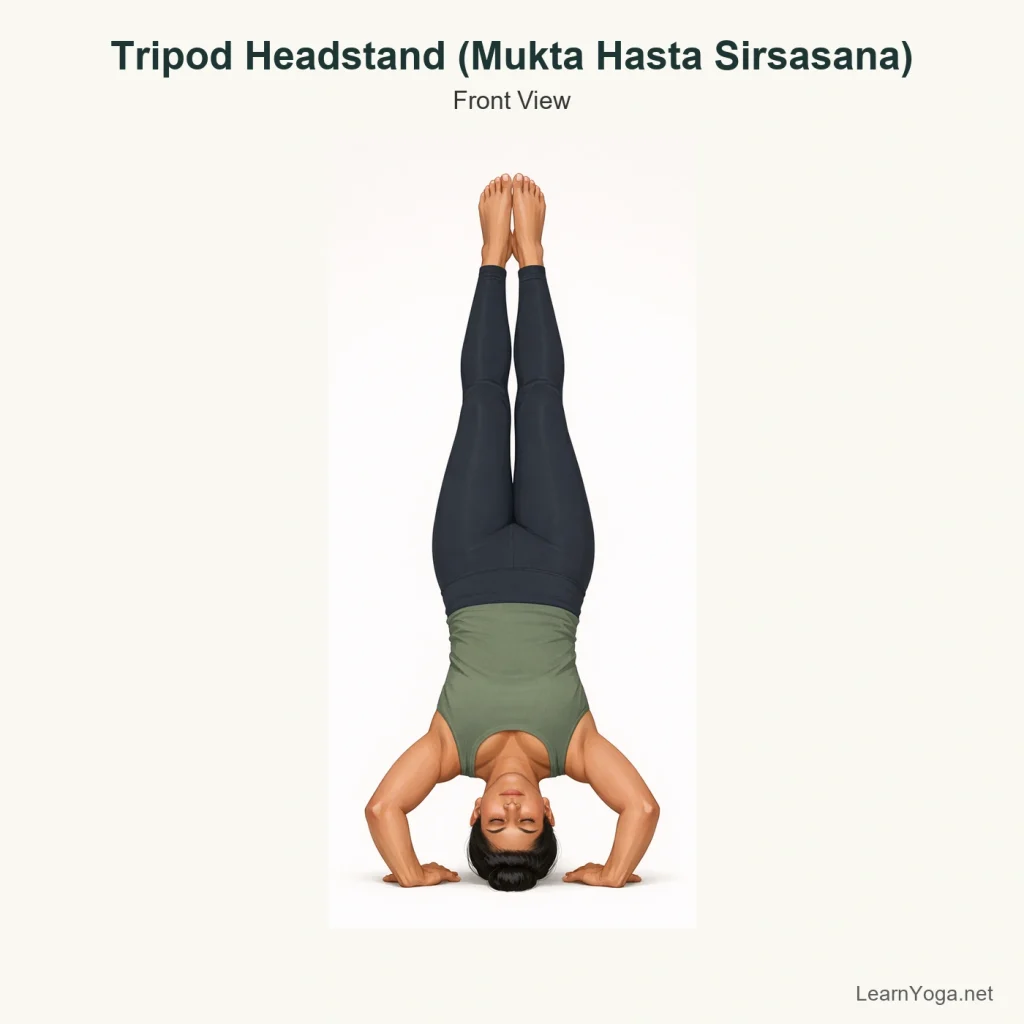
Tripod Headstand is a compact inversion where the head and hands make a three-point base. It asks for shoulder support, wrist tolerance, balance and clear control through the centre of the body rather than a hard kick upward.
Typical hold: 2 to 5 breaths at first, building gradually to 10 slow breaths if the shape stays steady.
Timing: Hold for 2 to 3 slow breaths on your first attempts. · Stay for 5 steady breaths if you can keep the neck quiet and the shoulders active. · Come down after 1 breath and repeat 2 to 3 times instead of forcing a long hold.
Tripod Headstand can feel more accessible than a forearm headstand because the hands are free and the base is wide, but it is not a casual version. The neck still bears some load, and the shape is steadier when the arms press strongly, the upper back stays broad and the knees draw in before the legs extend. Some people practise it with bent knees for a long time before straightening the legs. That is perfectly reasonable.
How to do Tripod Headstand
Begin in a low squat or crouch on your mat. Place your hands shoulder-width apart and spread the fingers.
Lower the crown of your head to the floor so your head and both hands form a triangle. Keep the back of the neck long rather than dropping heavily into the skull.
Bend the elbows to about a right angle, as though setting up a shelf with the upper arms. Press the hands down firmly and lift the shoulders slightly away from the ears.
Tuck the toes and lift the hips. Walk the feet closer until your hips move more over your shoulders and your upper back feels active.
Option one: place one knee, then the other, onto the backs of the upper arms and pause there. Breathe for 1 to 2 smooth breaths to organise the balance.
If that feels steady, draw the lower belly in gently and lift both feet from the floor. Keep the knees bent in close to the chest at first instead of throwing the legs upward.
Stay for a few calm breaths. Press evenly through both hands, keep the elbows from splaying wide, and let the shoulders keep some of the work so the neck does not collapse.
To come out, lower one foot and then the other with control, or return the knees to the upper arms first. Rest in Child's Pose for a few breaths before lifting your head.
Yogita's tip
If the pose feels wobbly the moment both feet leave the floor, do not rush to straighten the legs. Keeping the knees tucked usually gives you a much clearer centre and makes it easier to feel whether the hands are still carrying their share of the weight.
Benefits
Builds strength and coordination in the shoulders, arms and upper back.
Practises balance in an inverted shape with a relatively wide base.
Helps you organise core support so the legs can lift without a forceful jump.
Can prepare the body and attention for other inversions and arm balances.
Common mistakes
Kicking up fast and overshooting the balance point.
Letting most of the weight drop into the head instead of pressing strongly through the hands.
Allowing the elbows to slide wide, which makes the base less stable.
Walking in with rounded collapse at the neck rather than active shoulders and upper back.
Trying to straighten the legs before the tucked version is steady.
Make it work for you
Knees-on-arms hold
Set up the tripod base and place both knees on the backs of the upper arms. Stay there for 2 to 5 breaths without lifting the knees away. This lets you practise the base, head position and shoulder support with less balance demand.
Wall-supported tuck
Set your hands and head a short distance from a wall. Lift into a tucked version so the back lightly meets the wall if needed. Use the wall as a stopping point, not something to lean on heavily.
One-foot hover
From the setup, lift one foot a few centimetres while the other toes stay down, then switch sides. This helps you find how far the hips need to travel without committing to the full balance.
Alternatives
Dolphin Pose
Practise shoulder support and inversion preparation with the forearms down and the head lifted.
Use this if full weight-bearing on the head or wrists is not suitable today.
Forearm Balance Preparation
Work at the wall on forearm-based inversion strength without placing the head on the floor.
Useful if you want inversion practice with less direct neck loading.
Legs Up the Wall Pose
Lie on your back with the legs resting up the wall and the throat soft.
Choose this if getting upside down feels too intense or if balance is the main barrier.
Common variations
Tucked Tripod Headstand
The knees stay bent close to the chest rather than extending the legs upward. This is often the most workable place to learn control.
Tripod Headstand at the Wall
A wall behind you can help prevent overshooting while you learn how much lift comes from the hands, shoulders and centre.
Straight-Leg Tripod Headstand
From a steady tuck, the knees gradually extend until both legs reach upward. This increases the balance demand and usually needs more control through the midline.
Safety and contraindications
When to avoid or get individual guidance
Avoid this pose if you have a current neck injury or unresolved neck pain.
Skip it if weight-bearing through the wrists, elbows or shoulders is painful today.
This pose is generally not appropriate if you are new to inversions.
Keep noticeable work in the hands, arms and shoulders so the neck is not taking the whole load.
Enter with control rather than jumping or kicking hard.
If your elbows keep widening, pause and rebuild the base before lifting.
Come down as soon as the breath becomes strained or the shape starts to collapse into the head.
Stop the pose for any sharp neck pain, building pressure in the head, or a wobbly base that dumps weight into the shoulders, elbows, or wrists. Rebuild with a lower inversion or get individual guidance before trying Tripod Headstand again.
Accessibility and limited mobility
This pose is not a good starting point for many learners, especially if getting down to the floor, bearing weight through the wrists or shoulders, or managing neck pressure is difficult.
Older adults or anyone with reduced balance confidence may find a wall-supported setup more workable than practising in open space.
If kneeling and crouching are uncomfortable, use a folded blanket under the head only if it does not make the base unstable; otherwise choose a different inversion preparation.
Easier options
Use these related poses when you want a more accessible way to practise a similar movement or prepare for this pose.
How much weight should be on my head in Tripod Headstand?
Some weight does go into the head in this pose, but it should not feel like the neck is being compressed. Press the hands down firmly and keep the shoulders active so the load is shared. If you feel heavy or jammed in the neck, come down and rebuild the setup.
Is it better to learn this with bent knees or straight legs?
Bent knees are usually the better place to start. The tucked shape keeps the weight more compact and makes balance easier to read. Once that feels steady and controlled, you can explore straightening the legs little by little.
Why do I keep toppling over when I lift both feet?
Often the lift starts too late or too fast. Try walking the feet in more, bringing one knee and then the other onto the upper arms, and pausing there. A small exhale as you lift can help you move from the centre instead of kicking from the legs.
Can I practise Tripod Headstand at the wall?
Yes, a wall can be useful if you tend to overshoot. Set up so the wall is behind you and close enough to catch you lightly. Still aim to balance with your own hands, shoulders and centre rather than resting your whole shape on the wall.
What should I do after coming down?
Take a few quiet breaths in Child's Pose before lifting your head fully upright. That gives the neck and breath a moment to settle. If you feel rushed or dizzy, stay lower a little longer.
Reviewed for yoga instruction
Yogita
Certified Yoga Instructor with 5+ years of Teaching and Consistent Practice